Prioritizing child passenger safety is paramount; correctly installed car seats significantly reduce injury risk during vehicle travel.
Understanding proper installation and usage guidelines is crucial for every parent and caregiver.
The back seat is the safest location for children under 13‚ but proper placement depends on vehicle compatibility‚ as outlined in the owner’s manual.
Importance of Correct Installation
Correct car seat installation is absolutely vital for maximizing protection in the event of a crash. A properly secured car seat minimizes the risk of injury to a child by distributing crash forces effectively.
Improper installation‚ unfortunately‚ significantly reduces the car seat’s protective capabilities‚ potentially leading to severe consequences.
It’s essential to meticulously follow both the vehicle owner’s manual and the car seat’s instructions. These manuals detail specific installation procedures and compatible seating positions within your vehicle. Remember‚ not all seating locations are suitable for car seat installation.
Seeking assistance from a certified car seat technician is highly recommended‚ especially for first-time parents or when using a new car seat model. They can verify correct installation and address any concerns you may have‚ ensuring your child’s safety on every journey.
Understanding Car Seat Types
Different car seat types cater to varying child weights and heights‚ evolving with their growth. Rear-facing car seats are crucial for infants and young toddlers‚ offering superior head and neck support. As children grow‚ transitioning to forward-facing car seats with a top tether becomes necessary for continued safety.
Booster seats are designed for older children who have outgrown forward-facing seats but are still too small for adult seat belts. High-back boosters provide additional head and neck support‚ while backless boosters offer a more streamlined option.
Selecting the appropriate car seat type is paramount‚ always adhering to the manufacturer’s weight and height limits. Regularly checking these limits ensures your child remains adequately protected throughout their developmental stages.
Preparing for Installation
Before installation‚ thoroughly review both the vehicle and car seat owner’s manuals. Identifying suitable seating positions within your car is also essential for safety.
Reading Vehicle Owner’s Manual
Your vehicle owner’s manual is a critical resource for safe car seat installation. It details specific seating positions approved for car seats‚ considering seat belt configurations and LATCH system locations.
Not all seating locations within a vehicle are suitable for every car seat. The manual clarifies which positions offer the most secure installation‚ ensuring optimal protection for your child. It also explains how to locate and utilize the vehicle’s seat belts effectively for car seat restraint.
Furthermore‚ the manual may contain information regarding weight limits for specific seating positions and any vehicle-specific considerations that could impact car seat installation. Always consult your vehicle’s manual before proceeding with installation to guarantee a safe and compliant setup.
Reading Car Seat Owner’s Manual
The car seat owner’s manual is equally vital as the vehicle manual for correct installation. It provides detailed instructions specific to your car seat model‚ including the proper seat belt path and LATCH system usage.
Pay close attention to illustrations and diagrams demonstrating the correct installation procedure. The manual will indicate if a top tether is required for forward-facing installations and how to properly engage it. It also outlines weight and height limits for the car seat‚ ensuring your child fits safely.
Understanding the car seat’s features and limitations is crucial. The manual details adjustment mechanisms and provides guidance on achieving a snug and secure fit. Always refer to the car seat manual alongside the vehicle manual for a comprehensive understanding of the installation process.
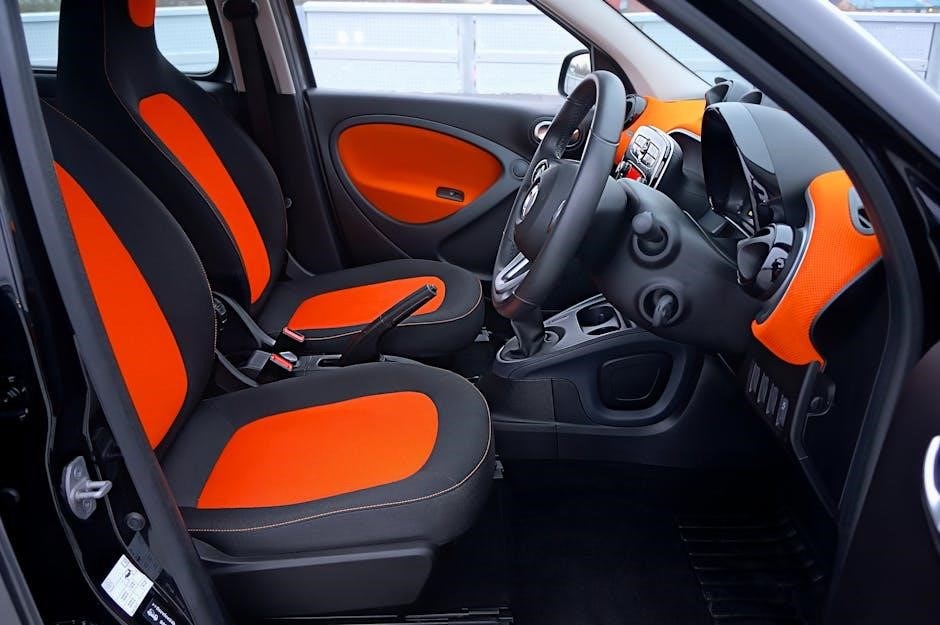
Locating Appropriate Seating Positions
The back seat is the safest place for children under 13‚ but not all seating positions are equal. Consult your vehicle owner’s manual to identify locations equipped with both seat belts and LATCH systems suitable for car seat installation.
Not all cars allow car seat installation in every seating position. The manual will specify compatible locations‚ considering seat belt geometry and vehicle structure. Prioritize positions that allow for a secure installation‚ minimizing movement.
Ensure the chosen position doesn’t compromise the safety of other passengers. Consider space requirements and accessibility. Always select the best possible location for each child’s car seat or booster seat‚ maximizing safety and comfort.

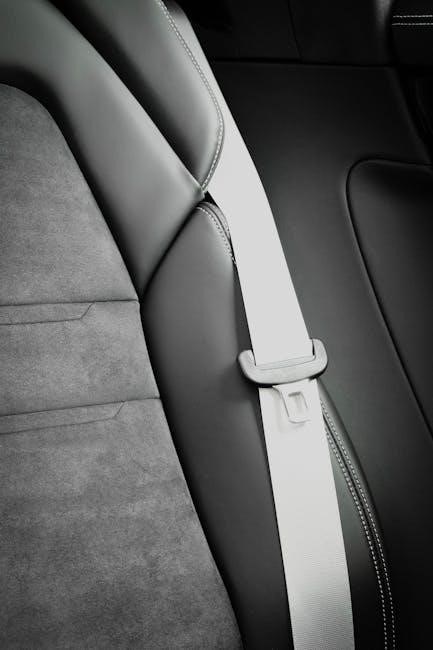
Installation Methods: Seat Belt
Securing a car seat with the vehicle seat belt involves threading the belt through designated paths on the car seat‚ as indicated by arrows or labels.
Forward-facing car seats require utilizing a locking device to prevent the seat belt from loosening during travel.
Correct Seat Belt Path
Identifying the correct seat belt path is fundamental for a secure car seat installation. Always consult both the vehicle owner’s manual and the car seat’s instruction manual to pinpoint the designated belt routing. Car seats feature specific pathways‚ often clearly marked with arrows or detailed instructions on the label itself.
Incorrect routing compromises the car seat’s ability to restrain effectively in a crash. Ensure the seat belt passes through the correct guides‚ avoiding any twists or obstructions. The path varies depending on whether the car seat is rear-facing or forward-facing. Following these guidelines ensures optimal protection for your child during every journey‚ maximizing safety and peace of mind.
Locking the Seat Belt
Securing the seat belt after threading it through the car seat requires locking it to prevent loosening during travel or a collision. Vehicles employ different locking mechanisms; some utilize a switch that engages once the belt is fully extended‚ while others require retracting the belt until it clicks into a locked position.
Consult your vehicle owner’s manual to determine the specific locking method for your car. Verify the belt is firmly locked by attempting to pull additional length – it should not move. A properly locked seat belt is crucial for maintaining a snug and secure car seat installation‚ ensuring optimal protection for your child on every ride.
Achieving a Snug Fit with Seat Belt
A snug car seat installation is vital for optimal safety; any excessive movement can compromise protection during a crash. After locking the seat belt‚ vigorously test the car seat’s stability. Attempt to move it side-to-side and front-to-back at the belt path.
A properly installed seat should not shift more than one inch in any direction. If excessive movement exists‚ re-thread the seat belt and ensure it’s securely locked. Repeat the testing process until a firm‚ stable installation is achieved. Remember‚ both rear-facing and forward-facing seats require this one-inch rule to be met for maximum safety.

Installation Methods: LATCH System
The LATCH system offers an alternative to seat belt installation‚ utilizing lower anchors and a top tether for a secure connection.
This method simplifies installation and enhances stability.
Understanding Lower Anchors
Lower anchors are built into vehicle seats and provide a direct connection point for car seats equipped with the LATCH system. These anchors simplify the installation process‚ offering a secure and reliable alternative to using the vehicle’s seat belt. Car seats utilize lower attachments that connect directly to these anchors‚ eliminating the need to maneuver a seat belt through specific pathways.
It’s important to locate the lower anchors in your vehicle – consult your vehicle owner’s manual for their precise location. Not all seating positions have lower anchors‚ so careful consideration is needed when choosing where to install the car seat. Remember‚ the LATCH system‚ including lower anchors‚ is designed to work in conjunction with the top tether‚ especially for forward-facing car seats‚ to maximize safety and minimize movement.
Using the Top Tether
The top tether is a crucial safety feature‚ particularly for forward-facing car seats. It connects the car seat to a designated anchor point in the vehicle‚ significantly reducing head excursion during a crash. This anchor point is typically located on the vehicle’s rear shelf‚ behind the seating position‚ or on the vehicle’s ceiling.
Always utilize the top tether when installing a forward-facing car seat; it dramatically improves the car seat’s performance and stability. The tether minimizes rotation and forward movement‚ offering enhanced protection for your child. Refer to both your vehicle and car seat manuals to locate the correct tether anchor point and understand how to properly connect and tighten the tether strap.
Achieving a Snug Fit with LATCH
A secure installation is paramount when using the LATCH system. After connecting the lower anchors‚ focus on achieving a “snug fit” – meaning the car seat should not move more than one inch side-to-side or front-to-back when tested at the belt path. Apply firm pressure to the car seat while tightening the LATCH straps.
Many vehicles and car seats have built-in mechanisms to aid tightening. If the seat still moves excessively‚ try repositioning it or consulting your vehicle and car seat manuals. Remember‚ both the seat belt and LATCH systems are safe; choose the method that provides the most secure installation for your vehicle and car seat.

Checking for Proper Installation
Verify a secure fit by testing for movement. A properly installed car seat shouldn’t shift more than one inch in any direction when firmly tested.
The One-Inch Rule
The “One-Inch Rule” is a critical component of car seat installation verification. This simple test determines if the car seat is securely fastened to the vehicle‚ minimizing movement during a crash or sudden stop. To perform this check‚ grasp the car seat near the belt path – where the seat belt or LATCH connectors thread through the car seat.
Attempt to move the car seat side to side and front to back. If the seat moves more than one inch in either direction‚ it is not installed tightly enough. Continue tightening the seat belt or LATCH system until the movement is reduced to one inch or less. This rule applies to both rear-facing and forward-facing car seats‚ regardless of whether you’re using the seat belt or LATCH system for installation.
Remember‚ a snug fit is essential for optimal protection.
Side-to-Side Movement Check
Assessing side-to-side movement is a vital step in ensuring a properly installed car seat. After initial installation and applying the One-Inch Rule‚ specifically check for excessive lateral (side-to-side) motion. Place your hands firmly on the sides of the car seat‚ at approximately the belt path level.
Apply pressure‚ attempting to move the seat from side to side. If the car seat shifts more than one inch laterally‚ the installation requires further tightening. This indicates insufficient tension in the seat belt or LATCH system. Continue adjusting the installation until side-to-side movement is limited to one inch or less.
Remember‚ minimizing any movement—including sideways—is crucial for maximizing the car seat’s protective capabilities during a collision.
Front-to-Back Movement Check
Evaluating front-to-back movement is a critical component of car seat installation verification. Following the initial installation and application of the One-Inch Rule‚ assess for excessive forward or backward motion. Grasp the car seat firmly‚ again at the belt path level‚ and apply force attempting to move it in a front-to-back direction.
A properly installed car seat should not move more than one inch in either direction. If excessive movement is detected‚ re-tighten the seat belt or LATCH connectors. Ensure the car seat is firmly secured to the vehicle’s structure.
This check‚ combined with the side-to-side assessment‚ confirms a secure and protective installation.

Rear-Facing Car Seat Installation
Rear-facing installation requires careful attention to angle indicators and recline settings to ensure proper protection for the child. Adjust as needed for optimal safety.
Angle Indicators and Adjustment
Many rear-facing car seats feature built-in angle indicators to help achieve the correct recline. These indicators‚ often bubble levels or lines‚ show when the seat is at the proper angle for infant safety. Refer to your car seat’s manual for specific instructions on interpreting the indicator.
If the seat doesn’t have an indicator‚ or if it’s difficult to read‚ use a rolled towel or pool noodle under the base near the vehicle seat bight to adjust the angle. The goal is to ensure the baby’s head doesn’t slump forward‚ compromising the airway.
Always double-check the recline angle after installation and adjustments. A properly reclined rear-facing seat provides optimal head and neck support in the event of a crash‚ safeguarding the child’s well-being during travel.
Recline Angle Considerations
Maintaining the correct recline angle is vital for rear-facing car seat safety. Infants lack the neck strength to support their heads in a more upright position‚ making proper recline crucial for airway protection during a crash.
Consult both the car seat and vehicle owner’s manuals for specific recline recommendations. Some vehicles have naturally reclined seats‚ while others may require adjustment. Avoid recline angles that are too steep‚ as this can cause the infant to slump forward.
A general guideline is to ensure the baby’s ear is below the top of the car seat shell. Regularly check and readjust the recline as needed‚ especially as the child grows‚ to maintain optimal safety and comfort.
Harness Height and Tightness
Correct harness height and tightness are fundamental to car seat safety‚ ensuring optimal restraint during a collision. For rear-facing seats‚ the harness straps should be at or below the child’s shoulders. As the child grows‚ adjust the harness height to maintain this positioning.
To check harness tightness‚ perform the “pinch test.” You should be unable to pinch any excess webbing at the child’s shoulder. The harness should lie flat against the child’s body‚ without any twists or slack.
Avoid adding bulky clothing or padding under the harness‚ as this can compress in a crash‚ creating dangerous slack. Ensure a snug‚ secure fit every time the child rides.
Forward-Facing Car Seat Installation
Forward-facing car seats require diligent installation‚ always utilizing the top tether to minimize head excursion during a crash and maximize safety.
Remember to consult both vehicle and car seat manuals for specific guidance on proper installation procedures.
Top Tether Usage – Critical Importance
The top tether is a vital component when installing a forward-facing car seat‚ significantly enhancing safety and reducing the risk of head injury during a sudden stop or collision. It connects the car seat to a designated anchor point in the vehicle‚ limiting forward movement.
On all forward-facing car seats‚ utilizing the top tether is not merely recommended‚ but essential. It minimizes the rotation of the car seat‚ keeping the child more securely positioned within the protective shell. Always refer to both the vehicle owner’s manual and the car seat’s instructions to locate the correct tether anchor point and ensure proper attachment. Ignoring this step compromises the car seat’s effectiveness.
Remember‚ a properly secured top tether can dramatically improve your child’s safety.
Harness Height and Tightness (Forward-Facing)
Correct harness adjustment is crucial for a forward-facing car seat to provide optimal protection. The harness straps should be positioned at or above your child’s shoulders. This ensures the straps effectively distribute crash forces across the stronger parts of the body.
To check for proper tightness‚ perform the “pinch test.” After buckling and tightening the harness‚ attempt to pinch the strap at the child’s collarbone. If you can pinch any excess webbing‚ the harness is too loose and needs further tightening. The harness should lie flat against the child‚ without any slack. Regularly adjust the harness height as your child grows to maintain the correct positioning.
Proper fit is paramount for safety.
Avoiding Common Installation Errors
Several common mistakes can compromise a forward-facing car seat’s effectiveness. Forgetting to use the top tether is a frequent error; always utilize it‚ as it significantly reduces head excursion during a crash. Incorrect harness positioning – straps too low on the shoulders – is another issue.
Ensure the seat belt or LATCH system is locked and provides a snug fit‚ with no more than one inch of movement side-to-side or front-to-back. Avoid using both the seat belt and LATCH simultaneously. Finally‚ double-check that the car seat is not installed in a location where it obstructs other passengers’ safety.
Careful attention to detail prevents these errors.

Booster Seat Usage & Installation
Transitioning to a booster seat depends on a child’s height and maturity. Proper seat belt positioning – across the shoulder and lap – is vital for optimal protection.
High-back boosters offer more support.
When to Transition to a Booster Seat
Determining the right time to move a child from a forward-facing car seat to a booster seat is a key safety decision. Children typically outgrow forward-facing seats based on height and weight limits specified by the car seat manufacturer. However‚ maturity plays a role too; a child needs to be able to sit properly throughout the entire ride.
Generally‚ this transition occurs when a child reaches the maximum height or weight allowed by their forward-facing seat. Before switching‚ ensure the child can maintain correct posture with the vehicle’s seat belt – the lap belt should lie low and snug across the upper thighs‚ and the shoulder belt should cross the middle of the shoulder and chest‚ not the neck or face. If the seat belt doesn’t fit correctly‚ it’s too soon for a booster.
Proper Positioning of the Seat Belt
Correct seat belt placement is vital when using a booster seat to ensure optimal protection in a crash. The vehicle’s seat belt must fit the child correctly‚ not the booster seat itself. The lap belt should always lie low and snug across the upper thighs‚ never across the stomach.
The shoulder belt should cross the middle of the shoulder and chest‚ avoiding the neck and face. Ensure the belt isn’t twisted or tucked under the arm. If the belt doesn’t naturally fall into this position‚ adjust the vehicle’s shoulder belt height or consider a high-back booster with integrated belt guides. A properly fitted seat belt maximizes the booster’s effectiveness.
High-Back vs. Backless Booster Seats
Choosing between a high-back and backless booster depends on your vehicle and child’s needs. High-back boosters offer better head and neck support‚ particularly in vehicles without headrests or with low seatbacks. They also often feature integrated belt guides‚ ensuring correct seat belt positioning.
Backless boosters are more portable and convenient‚ suitable for vehicles with adequate head support. However‚ proper vehicle seat compatibility is crucial. Regardless of the type‚ always verify the booster seat is securely positioned and the seat belt fits correctly – low on the thighs and across the shoulder. Prioritize a snug fit for optimal safety.

Resources and Assistance
Need help? Certified technicians can assist with installation‚ and Safe Kids Worldwide offers events and resources for car seat safety checks nationwide.
Locate a technician or event near you to ensure your child’s car seat is installed correctly and safely.
Finding Certified Car Seat Technicians
Ensuring correct car seat installation can be challenging‚ and seeking assistance from a certified technician is highly recommended. These professionals are specially trained to verify that your car seat is properly installed and used according to manufacturer guidelines and safety standards.
Safe Kids coalitions across the country host car seat checkup events and inspection stations where you can receive personalized guidance. To locate a certified technician or a nearby event‚ utilize the resources available through Safe Kids Worldwide. Their website provides a search tool to find assistance in your area‚ ensuring your child’s safety on every journey. Don’t hesitate to leverage this valuable support system!
Safe Kids Worldwide Resources
Safe Kids Worldwide offers a wealth of information and support to help parents and caregivers navigate car seat safety. Their website‚ https://ucsg.safekids.org/basic-tips/installing/‚ provides the “Ultimate Car Seat Guide‚” a comprehensive resource covering installation‚ usage‚ and best practices.
You’ll find detailed instructions‚ helpful videos‚ and access to a network of certified car seat technicians. Safe Kids Worldwide is dedicated to preventing injuries and saving lives through education and advocacy. Their resources are continually updated to reflect the latest safety standards and recommendations‚ ensuring you have the most current information available to protect your child.
Car Seat Checkup Events
Safe Kids coalitions frequently host car seat checkup events and inspection stations nationwide‚ offering free‚ hands-on assistance with installation. These events are staffed by certified car seat technicians who can verify your car seat is correctly installed and appropriate for your child’s age and weight.
These checkups provide peace of mind and ensure optimal protection in the event of a crash. If a local event isn’t readily available‚ Safe Kids Worldwide provides resources to locate a technician for individual assistance. Taking advantage of these events is a proactive step towards maximizing your child’s safety on every journey.
Ongoing Safety Checks
Regularly inspect the car seat for wear and tear‚ and always adjust it as your child grows to ensure a continued snug and secure fit;
Regularly Inspecting the Car Seat
Consistent car seat inspections are vital for maintaining optimal safety. Routinely check the harness straps for any signs of wear‚ fraying‚ or damage. Ensure the buckle functions smoothly and securely locks into place. Examine the car seat shell itself for cracks or breaks‚ especially after any impact‚ even minor ones.
Verify that all components‚ including the LATCH connectors and top tether‚ are in good working order. Clean the car seat regularly according to the manufacturer’s instructions‚ avoiding harsh chemicals that could compromise the materials. Remember‚ a well-maintained car seat is a safe car seat‚ providing crucial protection for your child on every journey.
Adjusting the Car Seat as Child Grows
As your child grows‚ it’s essential to adjust the car seat to ensure a continued secure fit. Regularly check and adjust the harness height‚ ensuring the straps are at or slightly above your child’s shoulders for rear-facing seats‚ and at or below their shoulders for forward-facing seats.
Tighten the harness straps each time you use the car seat‚ eliminating any slack. Recline angles may need adjustment as your child develops better head and neck control. Transition to a booster seat when your child outgrows the height or weight limits of their current car seat‚ following manufacturer guidelines for a safe and comfortable ride.
