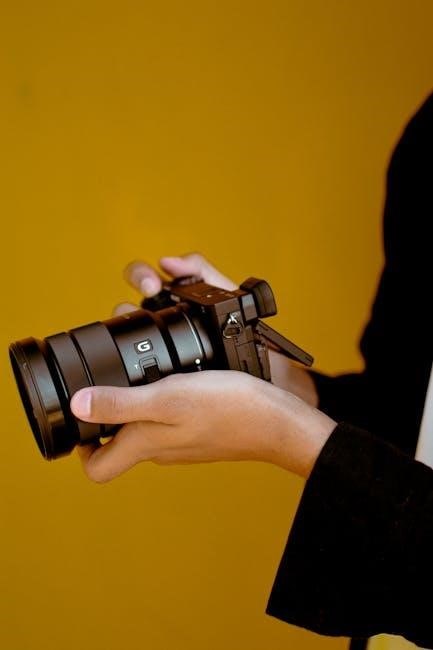
ISO in photography refers to the camera’s sensitivity to light, a crucial element in the exposure triangle, affecting image brightness and noise levels. Understanding ISO is essential for controlling light capture and achieving desired photographic effects.
1.1 Definition of ISO
ISO in photography stands for International Organization for Standardization and refers to the sensitivity of a camera’s sensor to light. It is a numerical value that determines how much light the sensor captures. Lower ISO numbers (e.g., ISO 100) mean the sensor is less sensitive, while higher numbers (e.g., ISO 6400) increase sensitivity. This setting allows photographers to adjust image brightness without changing aperture or shutter speed.
1.2 Importance of ISO in Photography
ISO plays a critical role in balancing exposure in photography. It allows photographers to adjust the camera’s light sensitivity, enabling proper exposure in various lighting conditions. By controlling ISO, photographers can achieve desired brightness levels without altering aperture or shutter speed. This flexibility is essential for capturing high-quality images in both bright and low-light environments, making ISO a fundamental tool for creative and technical control in photography.
Understanding ISO Sensitivity
ISO sensitivity refers to a standard measuring a camera’s light sensitivity, influencing exposure and image quality. It helps balance aperture and shutter speed for optimal results.
2.1 What Does ISO Represent?
ISO represents the camera’s sensitivity to light, measured as a numerical value. It indicates how much light the sensor captures, with lower values (e.g., ISO 100) being less sensitive and higher values (e.g., ISO 6400) being more sensitive. This setting directly impacts image brightness and noise levels, making it a critical factor in achieving proper exposure in various lighting conditions.
2.2 How ISO Affects Image Quality
ISO significantly impacts image quality by introducing noise or grain at higher settings. Lower ISOs (e.g., ISO 100-400) capture detail with minimal noise, ideal for bright lighting. Higher ISOs (e.g., ISO 1600+) amplify the signal, causing visible grain, especially in shadows. Balancing ISO with aperture and shutter speed is crucial for maintaining image clarity and achieving desired results without compromising quality.
The Exposure Triangle
The exposure triangle consists of ISO, aperture, and shutter speed, working together to control light intake and achieve desired photographic effects, ensuring proper image exposure.
3.1 ISO, Aperture, and Shutter Speed
ISO, aperture, and shutter speed form the exposure triangle, each controlling light intake. ISO adjusts sensor sensitivity, aperture regulates light entry, and shutter speed manages exposure duration. Balancing these elements ensures proper image exposure, with ISO affecting brightness and noise, aperture influencing depth of field, and shutter speed capturing motion or freeze frames. Together, they enable photographers to achieve desired artistic and technical effects in their images.
3.2 Balancing the Exposure Triangle
Balancing ISO, aperture, and shutter speed is crucial for achieving proper exposure. Increasing ISO brightens images but may introduce noise, while lowering it reduces noise but darkens photos. Aperture and shutter speed adjust light entry and duration, respectively. Photographers must balance these elements to avoid overexposure or underexposure, ensuring optimal image quality and desired artistic effects, such as motion blur or depth of field, without compromising brightness or clarity.

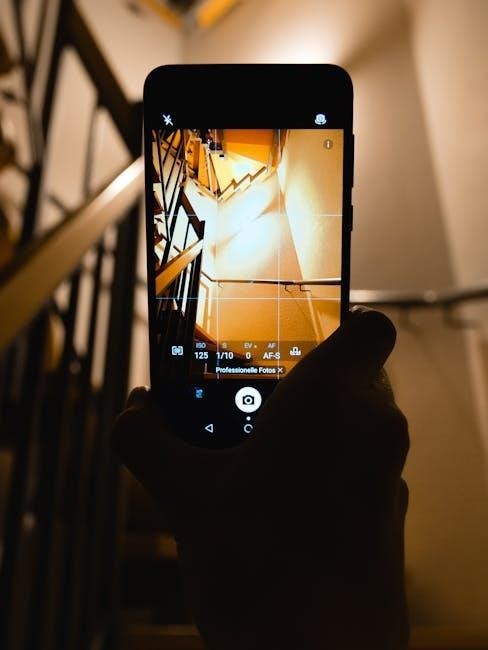
How ISO Works
ISO adjusts the camera sensor’s sensitivity to light. It works by amplifying the digital signal, allowing photography in low-light conditions but potentially introducing noise at higher settings.
4.1 Digital ISO vs. Film ISO
Digital ISO adjusts the camera sensor’s sensitivity by amplifying the signal, offering flexibility across shots. Film ISO is fixed per roll, relying on the film’s chemical sensitivity to light. Unlike film, digital ISO allows adjustments without changing the medium, providing convenience and versatility in various lighting conditions while managing noise levels effectively.
4.2 Amplifying the Digital Signal
Amplifying the digital signal in ISO adjusts the camera’s sensitivity by boosting the electrical signal from the sensor. This process brightens the image but can introduce noise, especially at high ISOs. Unlike film, digital ISO doesn’t change the sensor’s physical sensitivity but rather enhances the captured data. Modern cameras optimize this process to minimize noise, ensuring clearer images even when amplifying the signal significantly.
ISO Settings and Their Impact
ISO settings regulate light sensitivity, affecting image brightness and noise. Lower ISOs suit bright conditions, capturing sharp details, while higher ISOs enhance low-light shots but may introduce noise.
5.1 Low ISO Settings (ISO 100-400)
Low ISO settings (ISO 100-400) are ideal for bright lighting conditions, such as daylight or well-lit studios. These settings minimize noise and ensure sharp, detailed images. Using low ISO preserves image quality by preventing overexposure and maintaining natural colors. It’s perfect for outdoor photography, landscapes, or when sufficient light is available, allowing the camera to capture vibrant, noise-free results without compromising clarity or detail.
5.2 High ISO Settings (ISO 1600 and Above)
High ISO settings (ISO 1600 and above) are used in low-light conditions to capture images without additional lighting. While they allow more light sensitivity, they can introduce digital noise or grain, reducing image sharpness. Modern cameras mitigate noise better, but it’s crucial to balance ISO with aperture and shutter speed for optimal results in dim environments, such as concerts, nightscapes, or indoor events without flash;
Practical Applications of ISO
ISO is versatile in various photography scenarios, from bright outdoor settings using low ISO to capturing low-light moments with higher ISO, ensuring proper exposure and minimizing noise.
6.1 ISO in Different Lighting Conditions
ISO adapts to various lighting scenarios, optimizing image capture. In bright daylight, low ISO (100-400) prevents overexposure. Indoors or in low light, higher ISO (1600+) is used to brighten images without flash, though it may introduce noise. Balancing ISO with aperture and shutter speed ensures proper exposure across lighting conditions, from sunny landscapes to dim interiors, while maintaining image quality and minimizing noise.
6.2 ISO for Specific Photography Genres
ISO settings vary across photography genres to suit creative goals. Portrait photography often uses low ISO (100-800) for sharp, noise-free results. Sports and wildlife benefit from higher ISO (3200-6400) to freeze fast action in low light. Landscape photography may use low ISO for detail, while astrophotography relies on high ISO (1600-12800) to capture starlight. Genre-specific ISO choices optimize image quality and artistic intent.
Common Misconceptions About ISO
Many photographers believe high ISO always results in noisy images, but modern cameras often handle high ISOs well. Another myth is that ISO is only for low-light conditions.
7.1 Myth: High ISO Always Results in Noisy Images
High ISO doesn’t always mean noisy images. Modern cameras often handle high ISOs well, producing clean results. While noise can occur, advancements in technology have minimized its impact, allowing photographers to use higher ISOs effectively. Proper exposure and post-processing techniques also help reduce noise, making high ISOs practical for low-light photography without compromising image quality.
7.2 Myth: ISO is Only for Low Light Conditions
ISO is not exclusively for low-light photography. While it helps in such conditions by amplifying the sensor’s sensitivity, ISO also plays a role in bright lighting. Lower ISOs are typically used in well-lit environments to prevent overexposure. ISO balances the exposure triangle alongside aperture and shutter speed, making it versatile for various lighting scenarios, not just low-light situations.
Best Practices for Using ISO
Use the lowest possible ISO for your lighting conditions to minimize noise. Adjust ISO gradually, balancing it with aperture and shutter speed for optimal exposure control in photography.
8.1 When to Use Low ISO
Use low ISO settings (100-400) in bright lighting conditions to minimize noise and grain, ensuring sharp and clean images. Low ISO is ideal for outdoor photography, landscapes, or studio settings with ample light. It helps maintain image quality and prevents overexposure, allowing for precise control over highlights and details in well-lit environments.
8.2 When to Use High ISO
High ISO settings (1600 and above) are ideal for low-light conditions, such as indoor events, night photography, or when capturing moving subjects in dim environments. While higher ISOs can introduce noise, they allow you to freeze moments without additional lighting. Use high ISO judiciously to balance image quality and capture the scene effectively in challenging lighting situations.
ISO and Noise
ISO and noise are closely linked; higher ISO settings amplify the digital signal, often introducing grain or pixelation, especially in low-light conditions. Modern cameras mitigate this issue.
9.1 Understanding Digital Noise
Digital noise appears as grain or pixelation in images, especially when using high ISO settings. It occurs due to the amplification of the sensor’s signal, which can degrade image quality. Noise is more noticeable in low-light conditions and affects detail sharpness. Modern cameras and software often include noise reduction features to minimize its impact on photos.
9.2 Reducing Noise in High ISO Images
To minimize noise in high ISO images, use the lowest necessary ISO, ensure proper exposure, and leverage in-camera noise reduction features. Post-processing tools like Lightroom or Photoshop can also effectively reduce grain. Shooting in RAW format preserves more data, allowing for better noise correction without degrading image quality. Combining these techniques helps achieve cleaner, more professional-looking photos even in challenging lighting conditions.
ISO in Modern Cameras
Modern cameras feature advanced ISO technology, offering enhanced low-light performance with minimal noise. Improved sensors and processing enable higher ISO settings while maintaining image clarity and detail.
10.1 Advances in ISO Technology
Recent advancements in ISO technology have significantly improved low-light photography. Modern cameras now feature enhanced sensor designs and improved noise reduction algorithms, allowing for cleaner images at higher ISO settings. These innovations enable photographers to capture detailed shots in dim conditions without compromising quality, making ISO more versatile and efficient than ever before.
10.2 ISO Range in DSLR vs. Mirrorless Cameras
DSLR cameras typically offer ISO ranges from 100 to 6400 or 12800, while mirrorless cameras often extend this range significantly, sometimes up to 102400 or more. Mirrorless cameras generally provide better high-ISO performance due to advancements in sensor technology and noise reduction capabilities, making them superior in low-light conditions compared to traditional DSLRs.
ISO in Film Photography
ISO in film photography determines the film’s sensitivity to light, with lower ISO films (e.g., ISO 100) being less sensitive and higher ISO films (e.g., ISO 400) more sensitive. Film ISO is fixed, unlike digital, and higher ISO films produce grainier images.
11.1 Film ISO and Its Limitations
Film ISO is fixed, meaning the sensitivity is predetermined and cannot be changed once the film is loaded. Higher ISO films (e.g., ISO 400 or 800) produce grainier images, reducing sharpness. This limitation requires photographers to carefully select film based on lighting conditions, as changing ISO mid-shoot necessitates loading a new roll, adding complexity to the process.
11.2 Differences Between Film and Digital ISO
Digital ISO is adjustable per shot, offering flexibility, while film ISO is fixed once loaded. Film ISO produces grain at high sensitivities, whereas digital ISO introduces noise. Digital cameras allow instant ISO changes, while film requires reloading. This makes digital ISO more versatile for varying conditions, unlike film, which is less adaptable once chosen.
ISO in Video Photography
ISO in video photography controls the camera’s light sensitivity, helping maintain proper exposure and image quality, especially under changing lighting conditions during filming.
12.1 ISO Settings for Video
ISO settings in video photography regulate the camera’s sensitivity to light, impacting exposure and image quality. Lower ISOs are ideal for bright conditions to prevent overexposure, while higher ISOs help in low-light scenarios but may introduce noise. Balancing ISO with aperture and shutter speed is crucial for maintaining desired visual effects and ensuring smooth footage. Proper ISO management enhances dynamic range and overall video clarity in various lighting environments.
12.2 Managing ISO in Different Lighting Scenarios
In bright lighting, use lower ISO settings (100-400) to prevent overexposure and maintain detail. In medium light, ISO 400-800 balances exposure without introducing noise. For low-light conditions, higher ISOs (1600+) are necessary, but may result in grain. Adjusting ISO alongside aperture and shutter speed ensures optimal exposure, helping achieve professional video quality across diverse lighting environments while minimizing unwanted artifacts or overexposure issues.
Troubleshooting ISO-Related Issues
Troubleshooting ISO issues involves addressing overexposure and underexposure. Lower ISO for bright scenes to prevent blown highlights and raise it for darker settings to capture detail. Adjustments in post-processing can help mitigate noise caused by high ISO settings, ensuring balanced and professional-looking results in various lighting conditions.
13.1 Dealing with Overexposure
Overexposure occurs when high ISO settings capture too much light, resulting in washed-out colors and lost details. To fix this, lower the ISO, adjust aperture, or reduce shutter speed. Using neutral density filters can also help control light entry. Ensuring the lowest necessary ISO for the scene prevents overexposure and maintains image quality, avoiding the need for extensive post-processing corrections to recover details and color accuracy.
13.2 Fixing Underexposure
Underexposure occurs when images appear too dark, often due to insufficient light capture. To correct this, increase ISO within acceptable noise limits or widen aperture for more light. Slowing shutter speed can also help, though beware of motion blur. Using exposure compensation or external lighting enhances brightness without altering primary settings. While post-processing can brighten images, optimal results come from accurate in-camera adjustments, balancing ISO, aperture, and shutter speed for desired exposure.
Mastering ISO is crucial for photographers, enabling high-quality images in various lighting conditions. It balances light capture and noise, providing precise control over results.
14.1 Summary of Key Points
ISO is a fundamental concept in photography, representing the camera’s light sensitivity. It works alongside aperture and shutter speed to form the exposure triangle. Lower ISOs reduce noise but require more light, while higher ISOs brighten images yet may introduce grain. Understanding ISO’s role in balancing exposure and noise is essential for capturing sharp, high-quality photos in various lighting conditions, making it a vital skill for photographers.
14.2 Final Thoughts on Mastering ISO
Mastering ISO is key to enhancing your photography skills. It balances the exposure triangle, minimizing noise while ensuring proper lighting. Experiment with ISO settings to understand their impact and refine your technique for stunning, professional-quality images in diverse conditions. Modern cameras offer improved ISO performance, making it easier to achieve desired results without excessive noise, helping photographers capture moments with precision and creativity;
